1. Overview
1.1 What is Minikube?
Minikube is a tool that lets you run a Kubernetes cluster lightly in a local environment. It is useful for practicing Kubernetes or testing in a development environment. It runs on Mac, Linux, and Windows, and uses virtualization technology to build the cluster.
1.2 Comparison of Kubernetes Cluster Execution Methods
There are several ways to run a Kubernetes cluster, each with its own pros and cons.
| Item | Kind | Minikube | Docker Desktop Kubernetes | Rancher Desktop |
|---|---|---|---|---|
| Execution method | Docker container-based | Virtualization-based (supports Docker, VirtualBox, etc.) | Uses Docker's built-in K8s feature | Choose from multiple K8s distributions |
| Performance | Lightweight and fast | Supports various environments, somewhat heavy | Optimized for Mac/Windows | Somewhat heavy |
| LoadBalancer support | Not supported by default (requires extra setup) | Not supported by default (requires extra setup) | Provided by default | Provided by default |
| Use case | Development and testing environment | Development and local testing environment | Local development and simple testing | Practicing various K8s environments |
| Installation difficulty | Simple | Relatively easy | Included by default | Requires some setup |
In the case of minikube, it is the easiest way to build a k8s cluster and is often used for quickly spinning up a pod and testing, so let's look at how to use it.
2. Building a Cluster with Minikube on macOS
2.1 Installing Minikube
On Mac, you can easily install Minikube using Homebrew.
> brew install minikube
Verify that the installation completed.
> minikube version
minikube version: v1.34.0
commit: 210b148df93a80eb872ecbeb7e35281b3c582c61
2.2 Starting Minikube
Before running Minikube, you need to make sure Docker Desktop is running. Minikube uses Docker by default to run the Kubernetes cluster.
> docker ps # Check whether Docker is running
Start the Minikube cluster.
> minikube start
😄  minikube v1.34.0 on Darwin 15.3.2 (arm64)
    ▪ KUBECONFIG=/Users/user/.kube/config
🎉  minikube 1.35.0 is available! Download it from: https://github.com/kubernetes/minikube/releases/tag/v1.35.0
💡  To disable this notification, run the following command: 'minikube config set WantUpdateNotification false'
✨  Automatically selected the docker driver. Other choices: parallels, ssh
📌  Using Docker Desktop driver with root privileges
👍  Starting "minikube" primary control-plane node in "minikube" cluster
🚜  Pulling base image v0.0.45 ...
🔥  Creating docker container (CPUs=2, Memory=7789MB) ...
🐳  Preparing Kubernetes v1.31.0 on Docker 27.2.0 runtime
    ▪ Generating certificates and keys ...
    ▪ Booting up control plane ...
    ▪ Configuring RBAC rules ...
🔗  Configuring bridge CNI (Container Networking Interface) ...
🔎  Verifying Kubernetes components...
    ▪ Using image gcr.io/k8s-minikube/storage-provisioner:v5
🌟  Enabled addons: storage-provisioner, default-storageclass
🏄  Done! kubectl is now configured to use "minikube" cluster and "default" namespace by default.
Personally, since the
minikubecommand is long, I set up a shellaliasand use it.
> echo 'alias mk=minikube' >> ~/.zshrc
> source ~/.zshrc

# minikube start
> mk start
2.3 Deploying an Application
For a simple test, let's deploy an Echo Server application to the Kubernetes cluster.
apiVersion: v1
kind: Namespace
metadata:
  name: echoserver
---
apiVersion: apps/v1
kind: Deployment
metadata:
  name: echoserver
  namespace: echoserver
spec:
  replicas: 1
  selector:
    matchLabels:
      app: echoserver
  template:
    metadata:
      labels:
        app: echoserver
    spec:
      containers:
      - image: ealen/echo-server:latest
        imagePullPolicy: IfNotPresent
        name: echoserver
        ports:
        - containerPort: 80
        env:
        - name: PORT
          value: "80"
---
apiVersion: v1
kind: Service
metadata:
  name: echoserver
  namespace: echoserver
spec:
  ports:
    - port: 80
      targetPort: 80
      protocol: TCP
  type: ClusterIP
  selector:
    app: echoserver
The echo-server k8s yaml has already been created in the tutorial-go repo, so run it with the command below.
> cd /Users/user/GolandProjects/tutorials-go/cloud/kubernetes/echo-server
> kc --namespace=echoserver apply -f echo.kube.yaml
namespace/echoserver unchanged
deployment.apps/echoserver created
service/echoserver created
Verify that the deployment was successful.
> kc get pod -o wide
NAME                          READY   STATUS    RESTARTS   AGE   IP           NODE       NOMINATED NODE   READINESS GATES
echoserver-6c45798fdc-b8kcr   1/1     Running   0          36s   10.244.0.3   minikube   <none>           <none>
2.4 Accessing from Outside
2.4.1 Exposing Externally with the Minikube Service Command
Since Minikube does not support LoadBalancer by default, use the minikube service command to make it accessible from outside.
> minikube -n echoserver service echoserver --url
😿  service echoserver/echoserver has no node port
❗  Services [echoserver/echoserver] have type "ClusterIP" not meant to be exposed, however for local development minikube allows you to access this !
http://127.0.0.1:59333
❗  Because you are using a Docker driver on darwin, the terminal needs to be open to run it.
After checking the printed URL, send a curl request to that address to verify it works.
> curl http://localhost:59333
{"host":{"hostname":"localhost","ip":"::ffff:10.244.0.1","ips":[]},"http":{"method":"GET","baseUrl":"","originalUrl":"/","protocol":"http"},"request":{"params":{"0":"/"},"query":{},"cookies":{},"body":{},"headers":{"host":"localhost:59333","user-agent":"curl/8.7.1","accept":"*/*"}},"environment":{"PATH":"/usr/local/sbin:/usr/local/bin:/usr/sbin:/usr/bin:/sbin:/bin","HOSTNAME":"echoserver-6c45798fdc-qm9br","PORT":"80","KUBERNETES_PORT":"tcp://10.96.0.1:443","ECHOSERVER_PORT_80_TCP_PROTO":"tcp","KUBERNETES_SERVICE_PORT_HTTPS":"443","KUBERNETES_PORT_443_TCP_PORT":"443","KUBERNETES_PORT_443_TCP_PROTO":"tcp","ECHOSERVER_PORT_80_TCP_PORT":"80","ECHOSERVER_PORT_80_TCP_ADDR":"10.104.239.11","KUBERNETES_SERVICE_PORT":"443","KUBERNETES_PORT_443_TCP":"tcp://10.96.0.1:443","ECHOSERVER_SERVICE_HOST":"10.104.239.11","ECHOSERVER_SERVICE_PORT":"80","ECHOSERVER_PORT":"tcp://10.104.239.11:80","ECHOSERVER_PORT_80_TCP":"tcp://10.104.239.11:80","KUBERNETES_SERVICE_HOST":"10.96.0.1","KUBERNETES_PORT_443_TCP_ADDR":"10.96.0.1","NODE_VERSION":"20.11.0","YARN_VERSION":"1.22.19","HOME":"/root"}}
2.4.2 Using Port Forwarding
With port forwarding, you can expose a specific port externally.
> kubectl port-forward svc/echoserver 8080:80
Forwarding from 127.0.0.1:8080 -> 80
Forwarding from [::1]:8080 -> 80
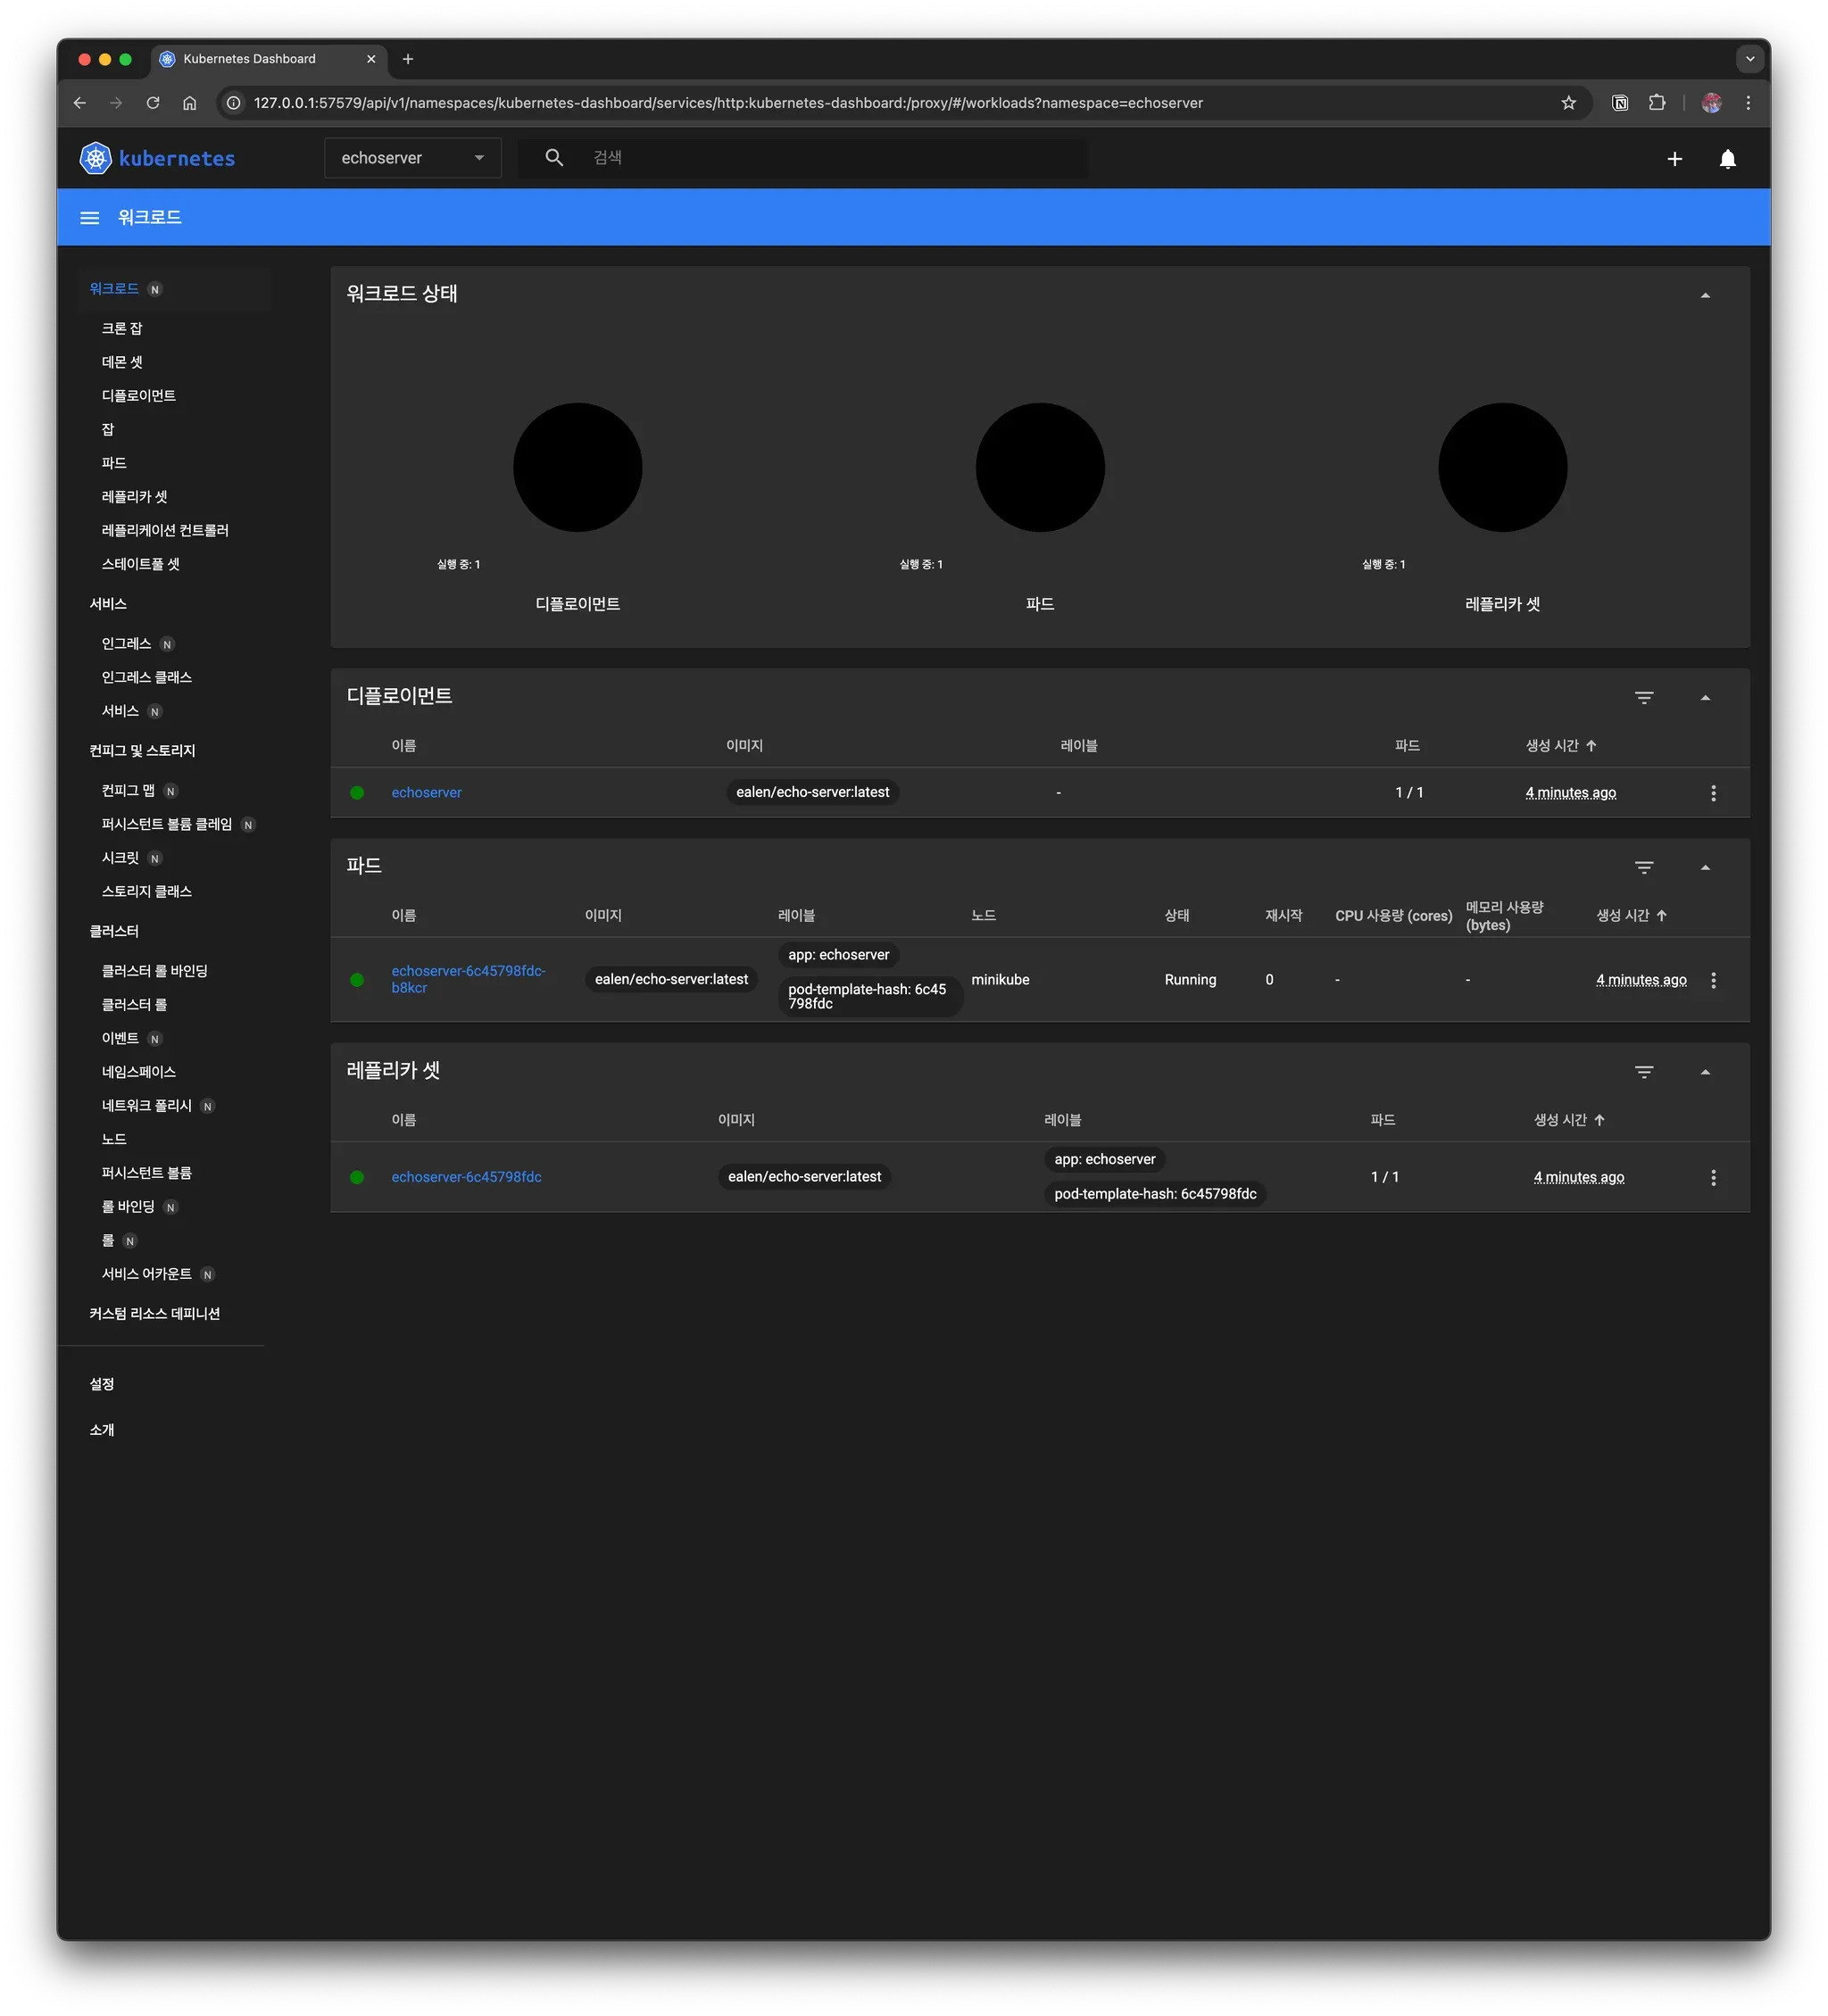
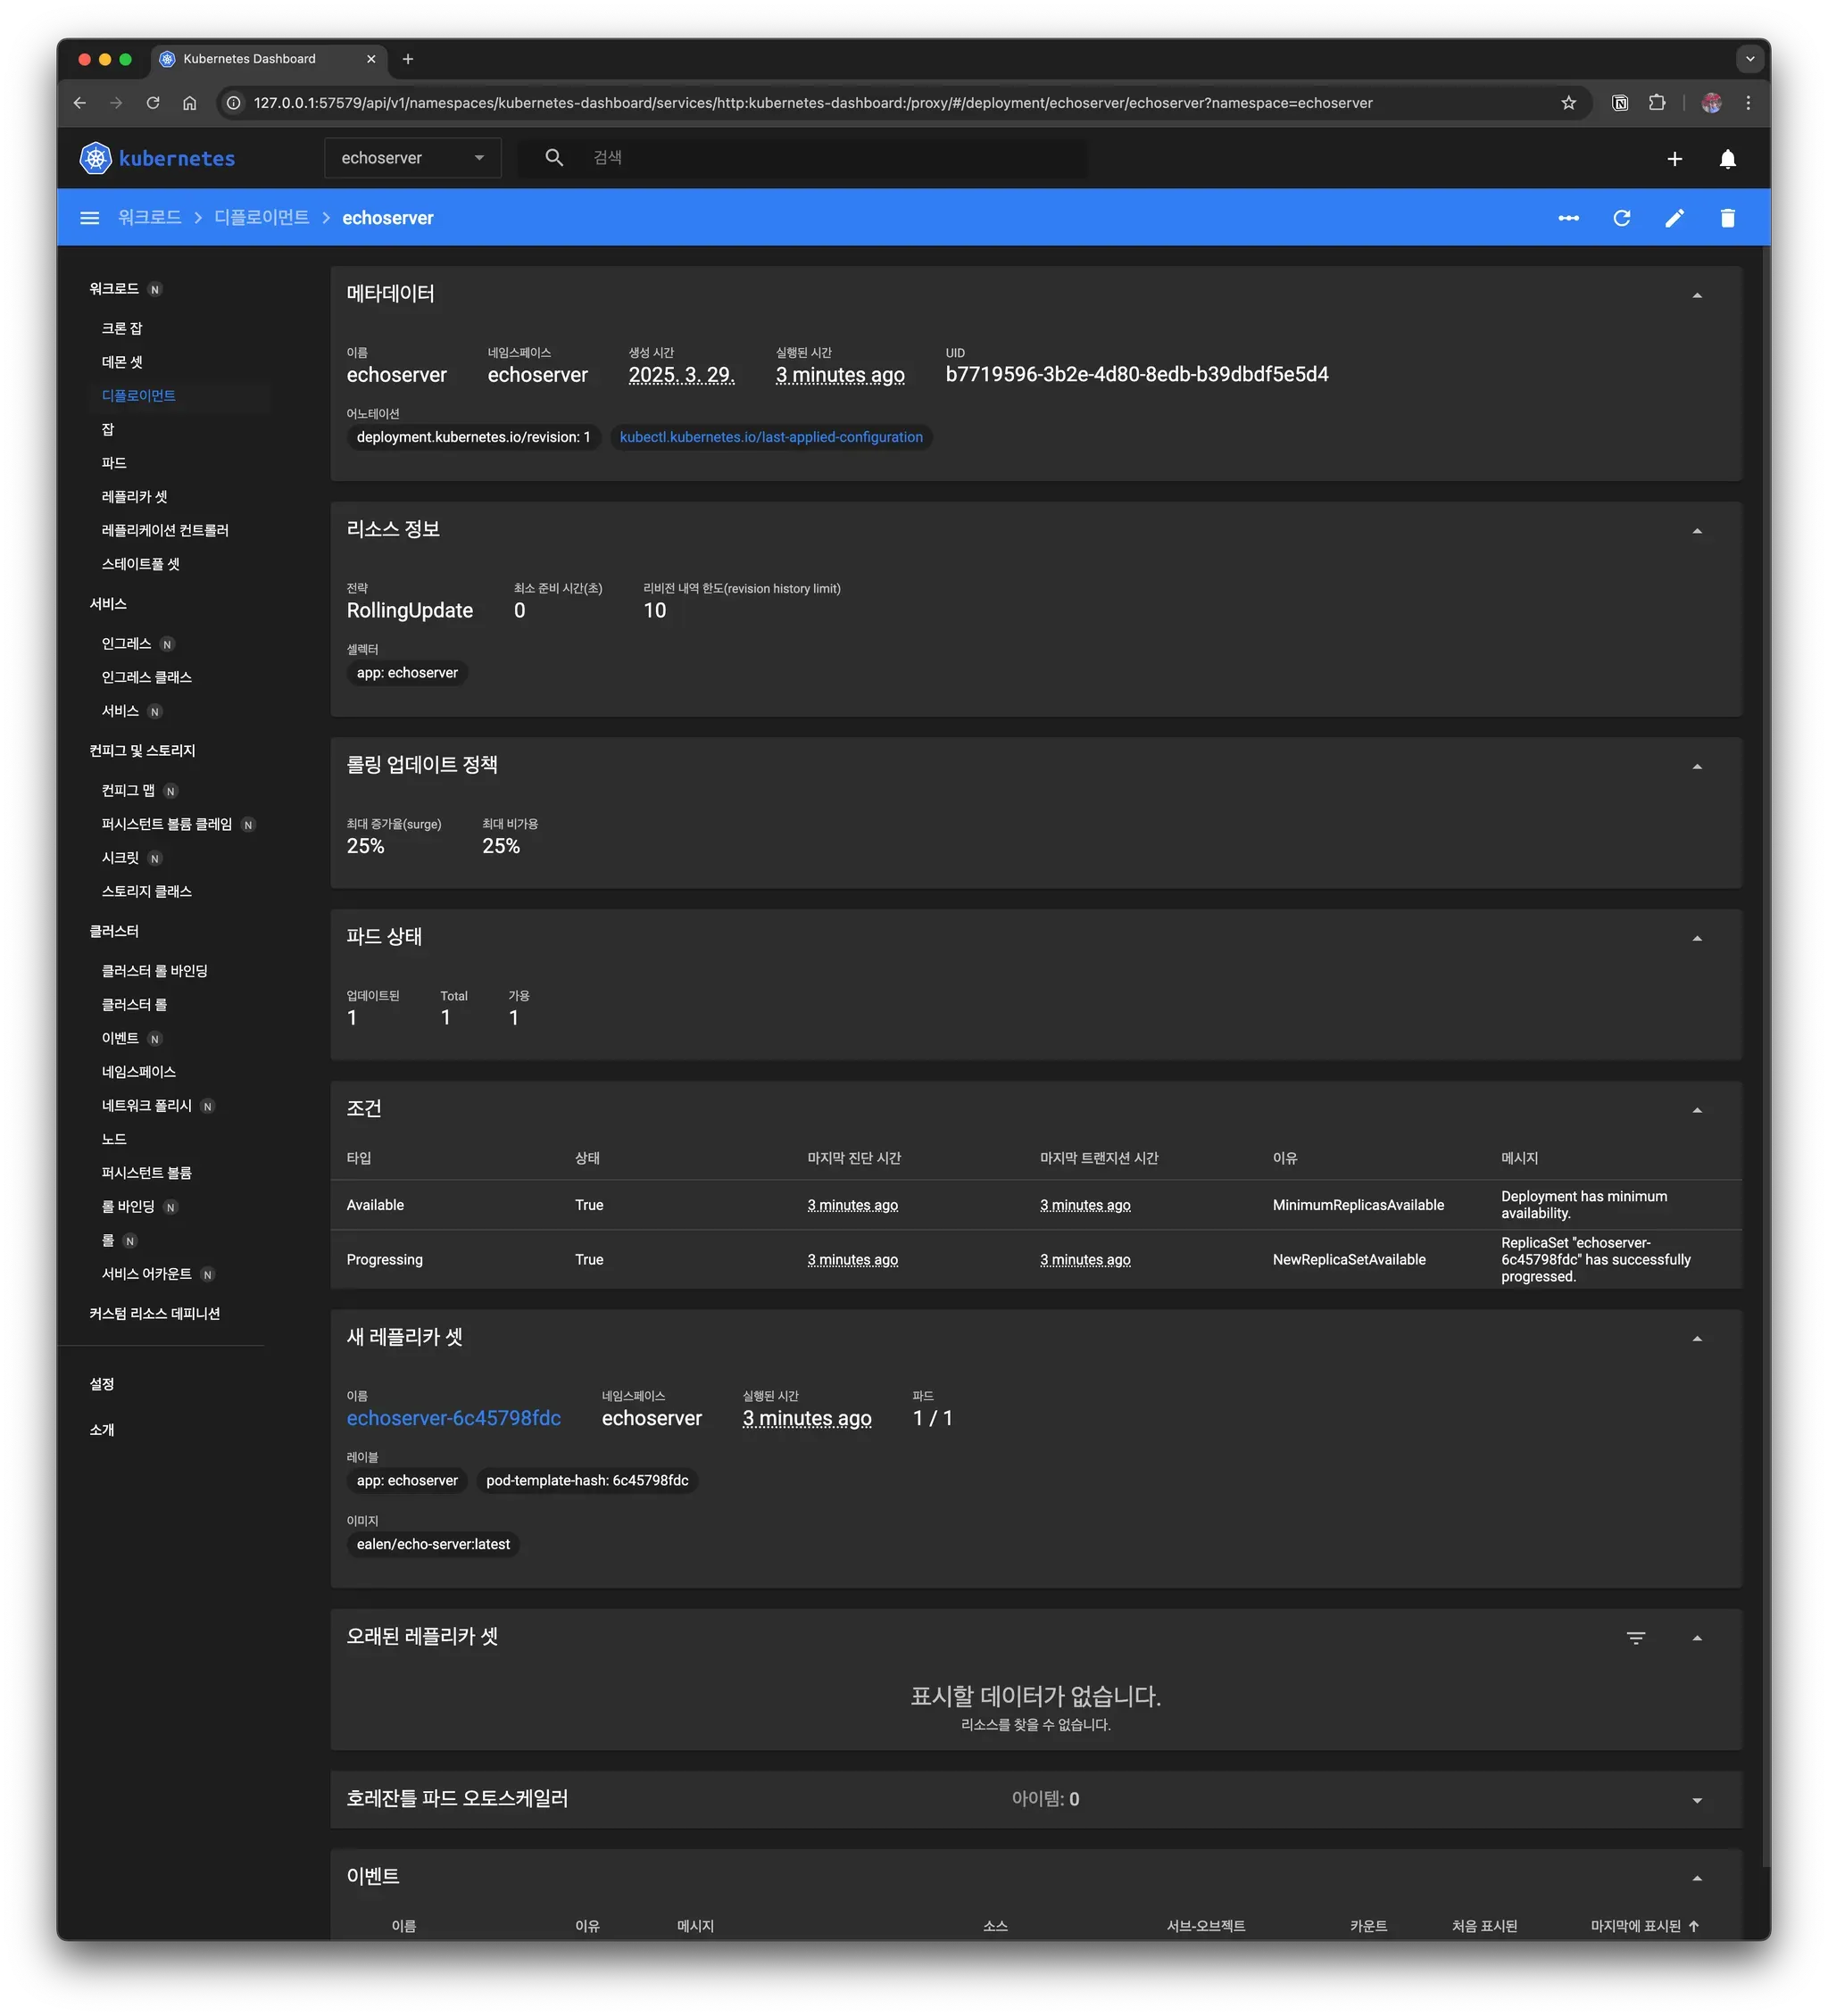
2.5 Minikube Dashboard
Minikube includes a Kubernetes dashboard by default. To run it, enter the following command.
> minikube dashboard
🔌  Enabling dashboard ...
    ▪ Using image docker.io/kubernetesui/dashboard:v2.7.0
    ▪ Using image docker.io/kubernetesui/metrics-scraper:v1.0.8
💡  Some dashboard features require the metrics-server addon. To enable all features please run:

	minikube addons enable metrics-server

🤔  Verifying dashboard health ...
🚀  Launching proxy ...
🤔  Verifying proxy health ...
🎉  Opening http://127.0.0.1:57579/api/v1/namespaces/kubernetes-dashboard/services/http:kubernetes-dashboard:/proxy/ in your default browser...
The browser opens, allowing you to visually check the state of the Kubernetes cluster.
2.6 Stopping and Deleting Minikube
2.6.1 Stopping Minikube
You can stop minikube with Minikube stop.
> minikube stop
✋  Stopping node "minikube"  ...
🛑  Powering off "minikube" via SSH ...
🛑  1 node stopped.
2.6.2 Deleting Minikube
To completely delete the Minikube cluster, run the following command.
> minikube delete
🔥  Deleting "minikube" in docker ...
🔥  Deleting container "minikube" ...
🔥  Removing /Users/user/.minikube/machines/minikube ...
💀  Removed all traces of the "minikube" cluster.
3. Conclusion
In this post, we looked at how to build a Kubernetes cluster using Minikube on macOS. Minikube is one of my most preferred tools because it is the easiest way to build and test a k8s cluster in a local environment.