There are several services you can use to build an API server, as listed below.
- Heroku
- GCP
- PythonAnywhere
- AWS (Amazon Web Service)
Most of these services offer a free plan with limited resources and features. Personally, among the various services, I prefer AWS since it can still be used for free for a long period of 12 months. I don't set up EC2 very often, but whenever I build an API on EC2, the process of googling and configuring it each time takes time. As I built stock-api this time, I'm documenting it on the blog so I can refer back to it later.
1. Server Setup Prerequisites
1.1 Creating an AWS Account
An AWS account can be used for free for 12 months, but you need to create an account with an email address. Rather than creating a new email address each time, I recommend using Google's alias feature.
Create an AWS account and log in to the console.
2. Building an EC2 Server on AWS
2.1 Creating an EC2 Instance
Find the EC2 service among the AWS services and create a virtual machine on AWS EC2. From the left menu, click Instances > Launch instances button.
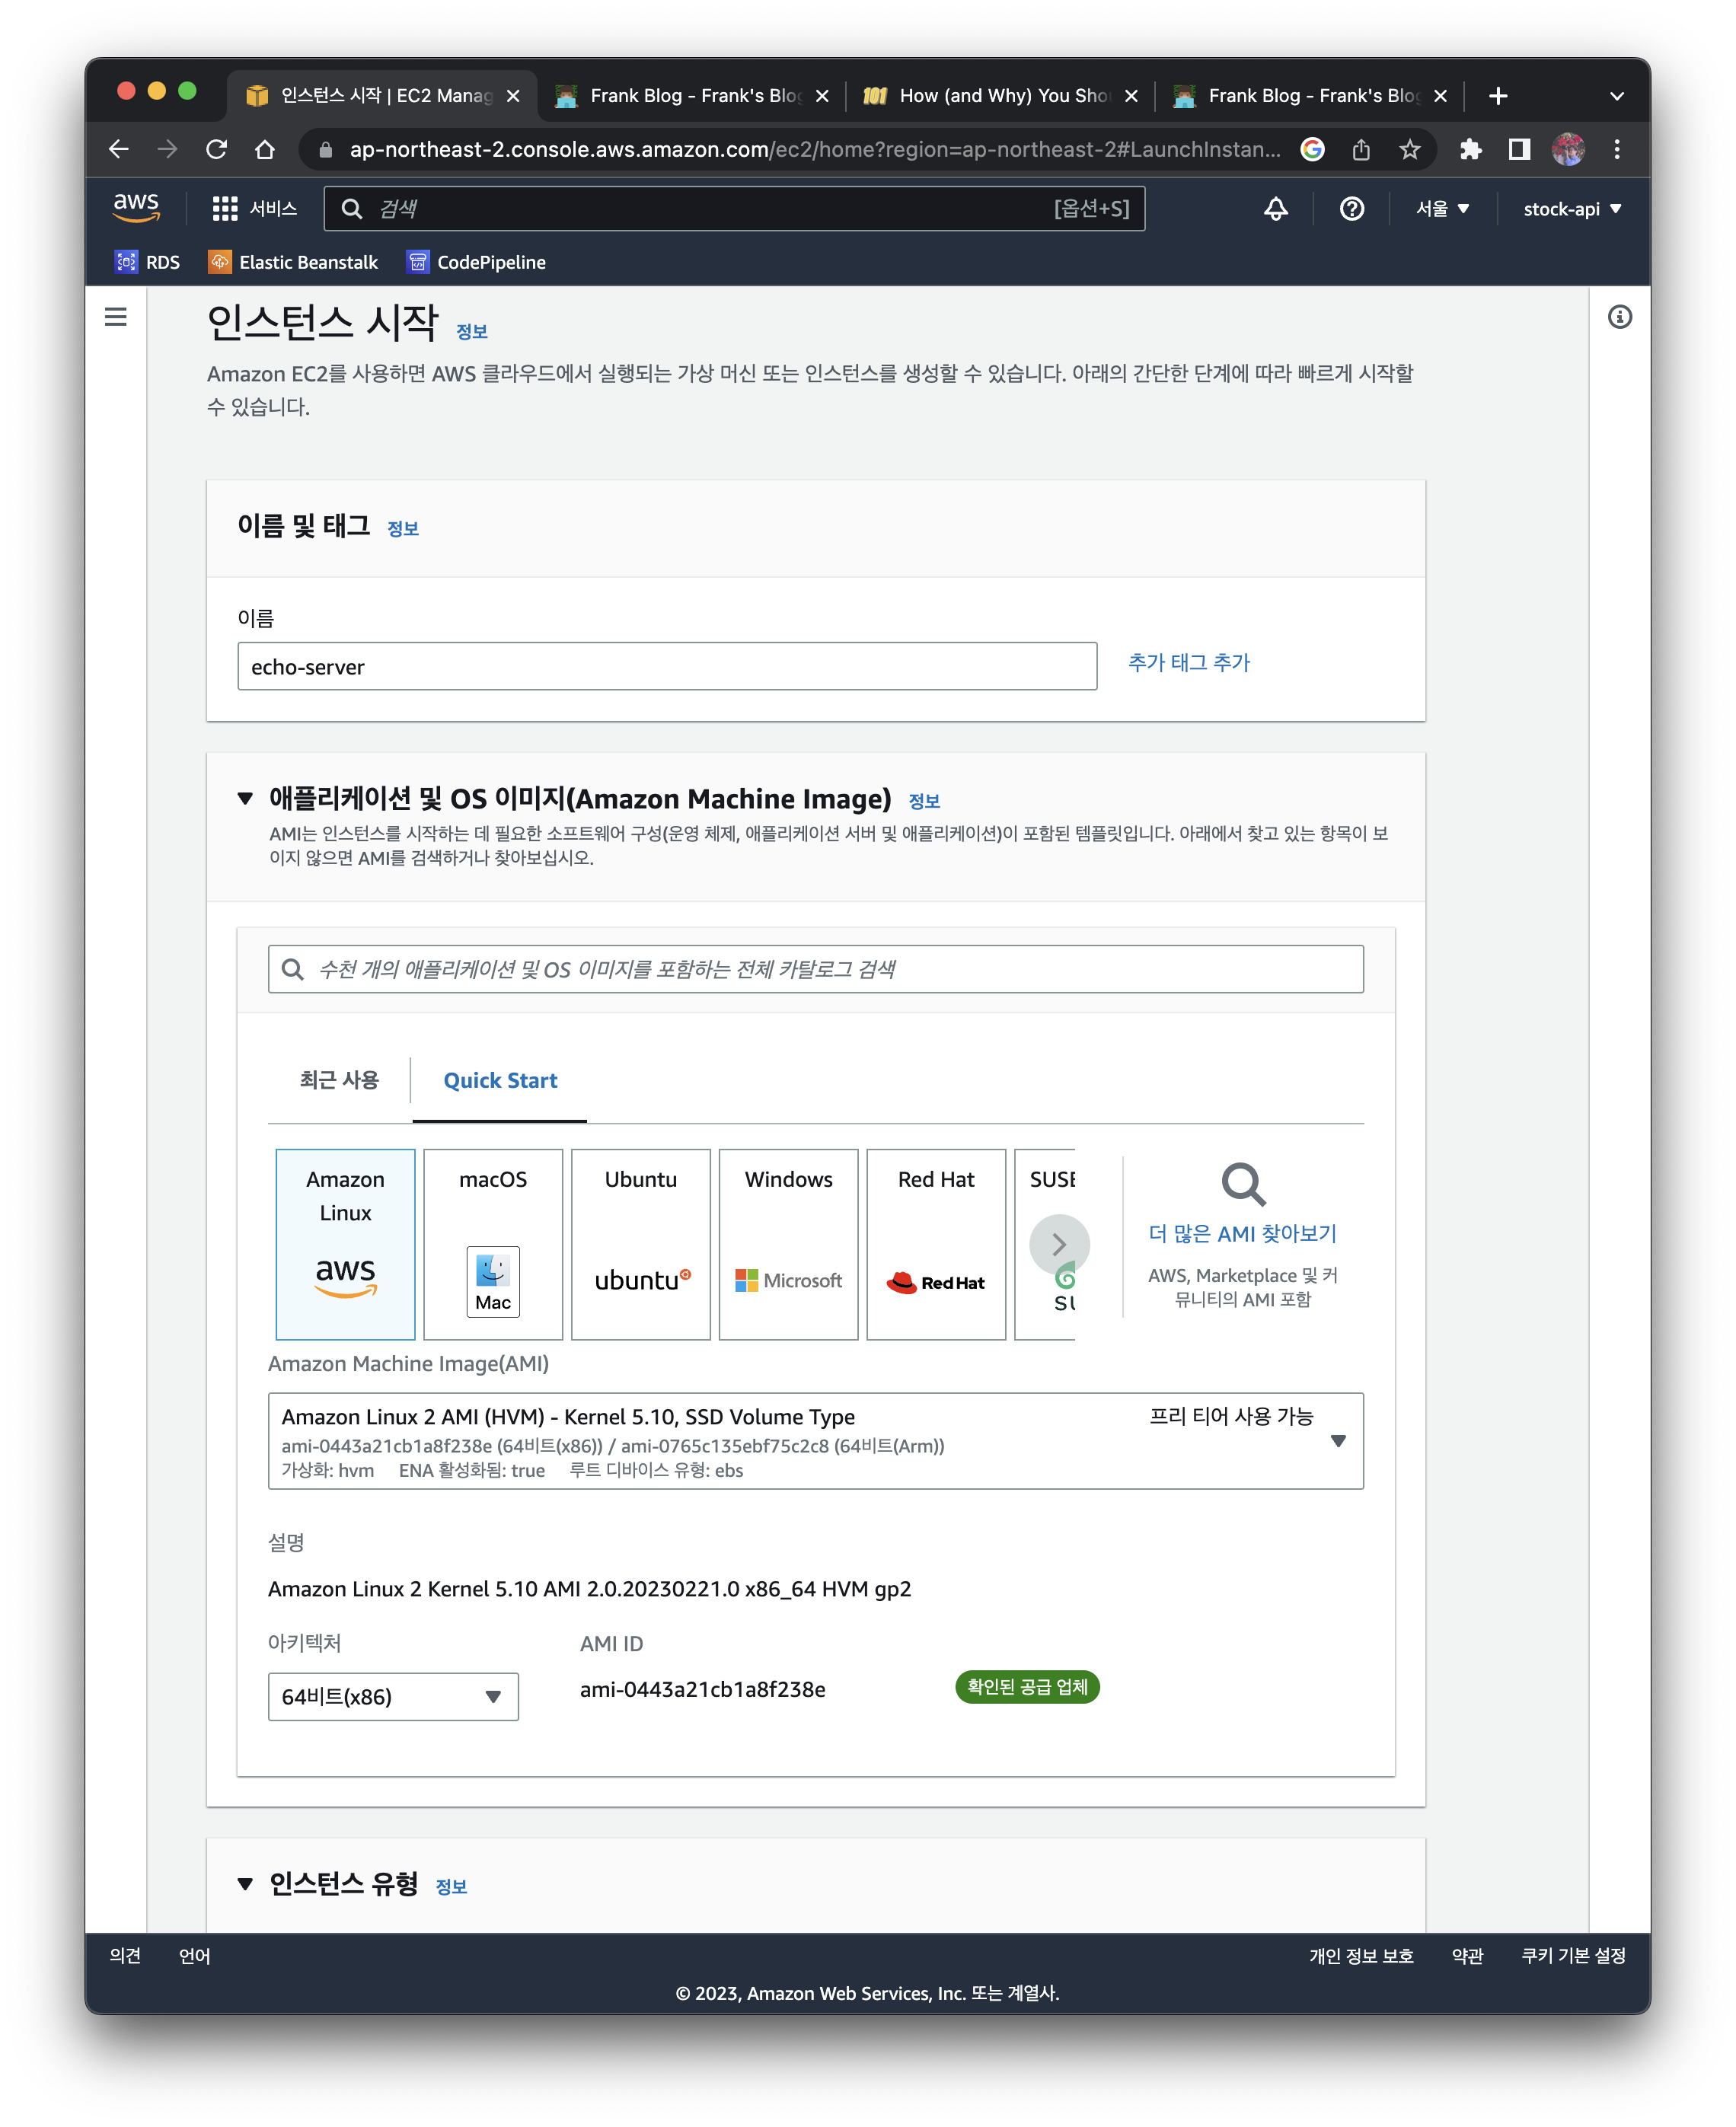
By default, when creating an EC2 instance, the default values are already set. The values you need to fill in are as follows.
-
Name: enter a name you want (ex.
echo-server) -
Application and OS Images
- Image:
Amazon Linux 2 AMI - Architecture:
64-bit
- Image:
-
Instance type: t2 micro
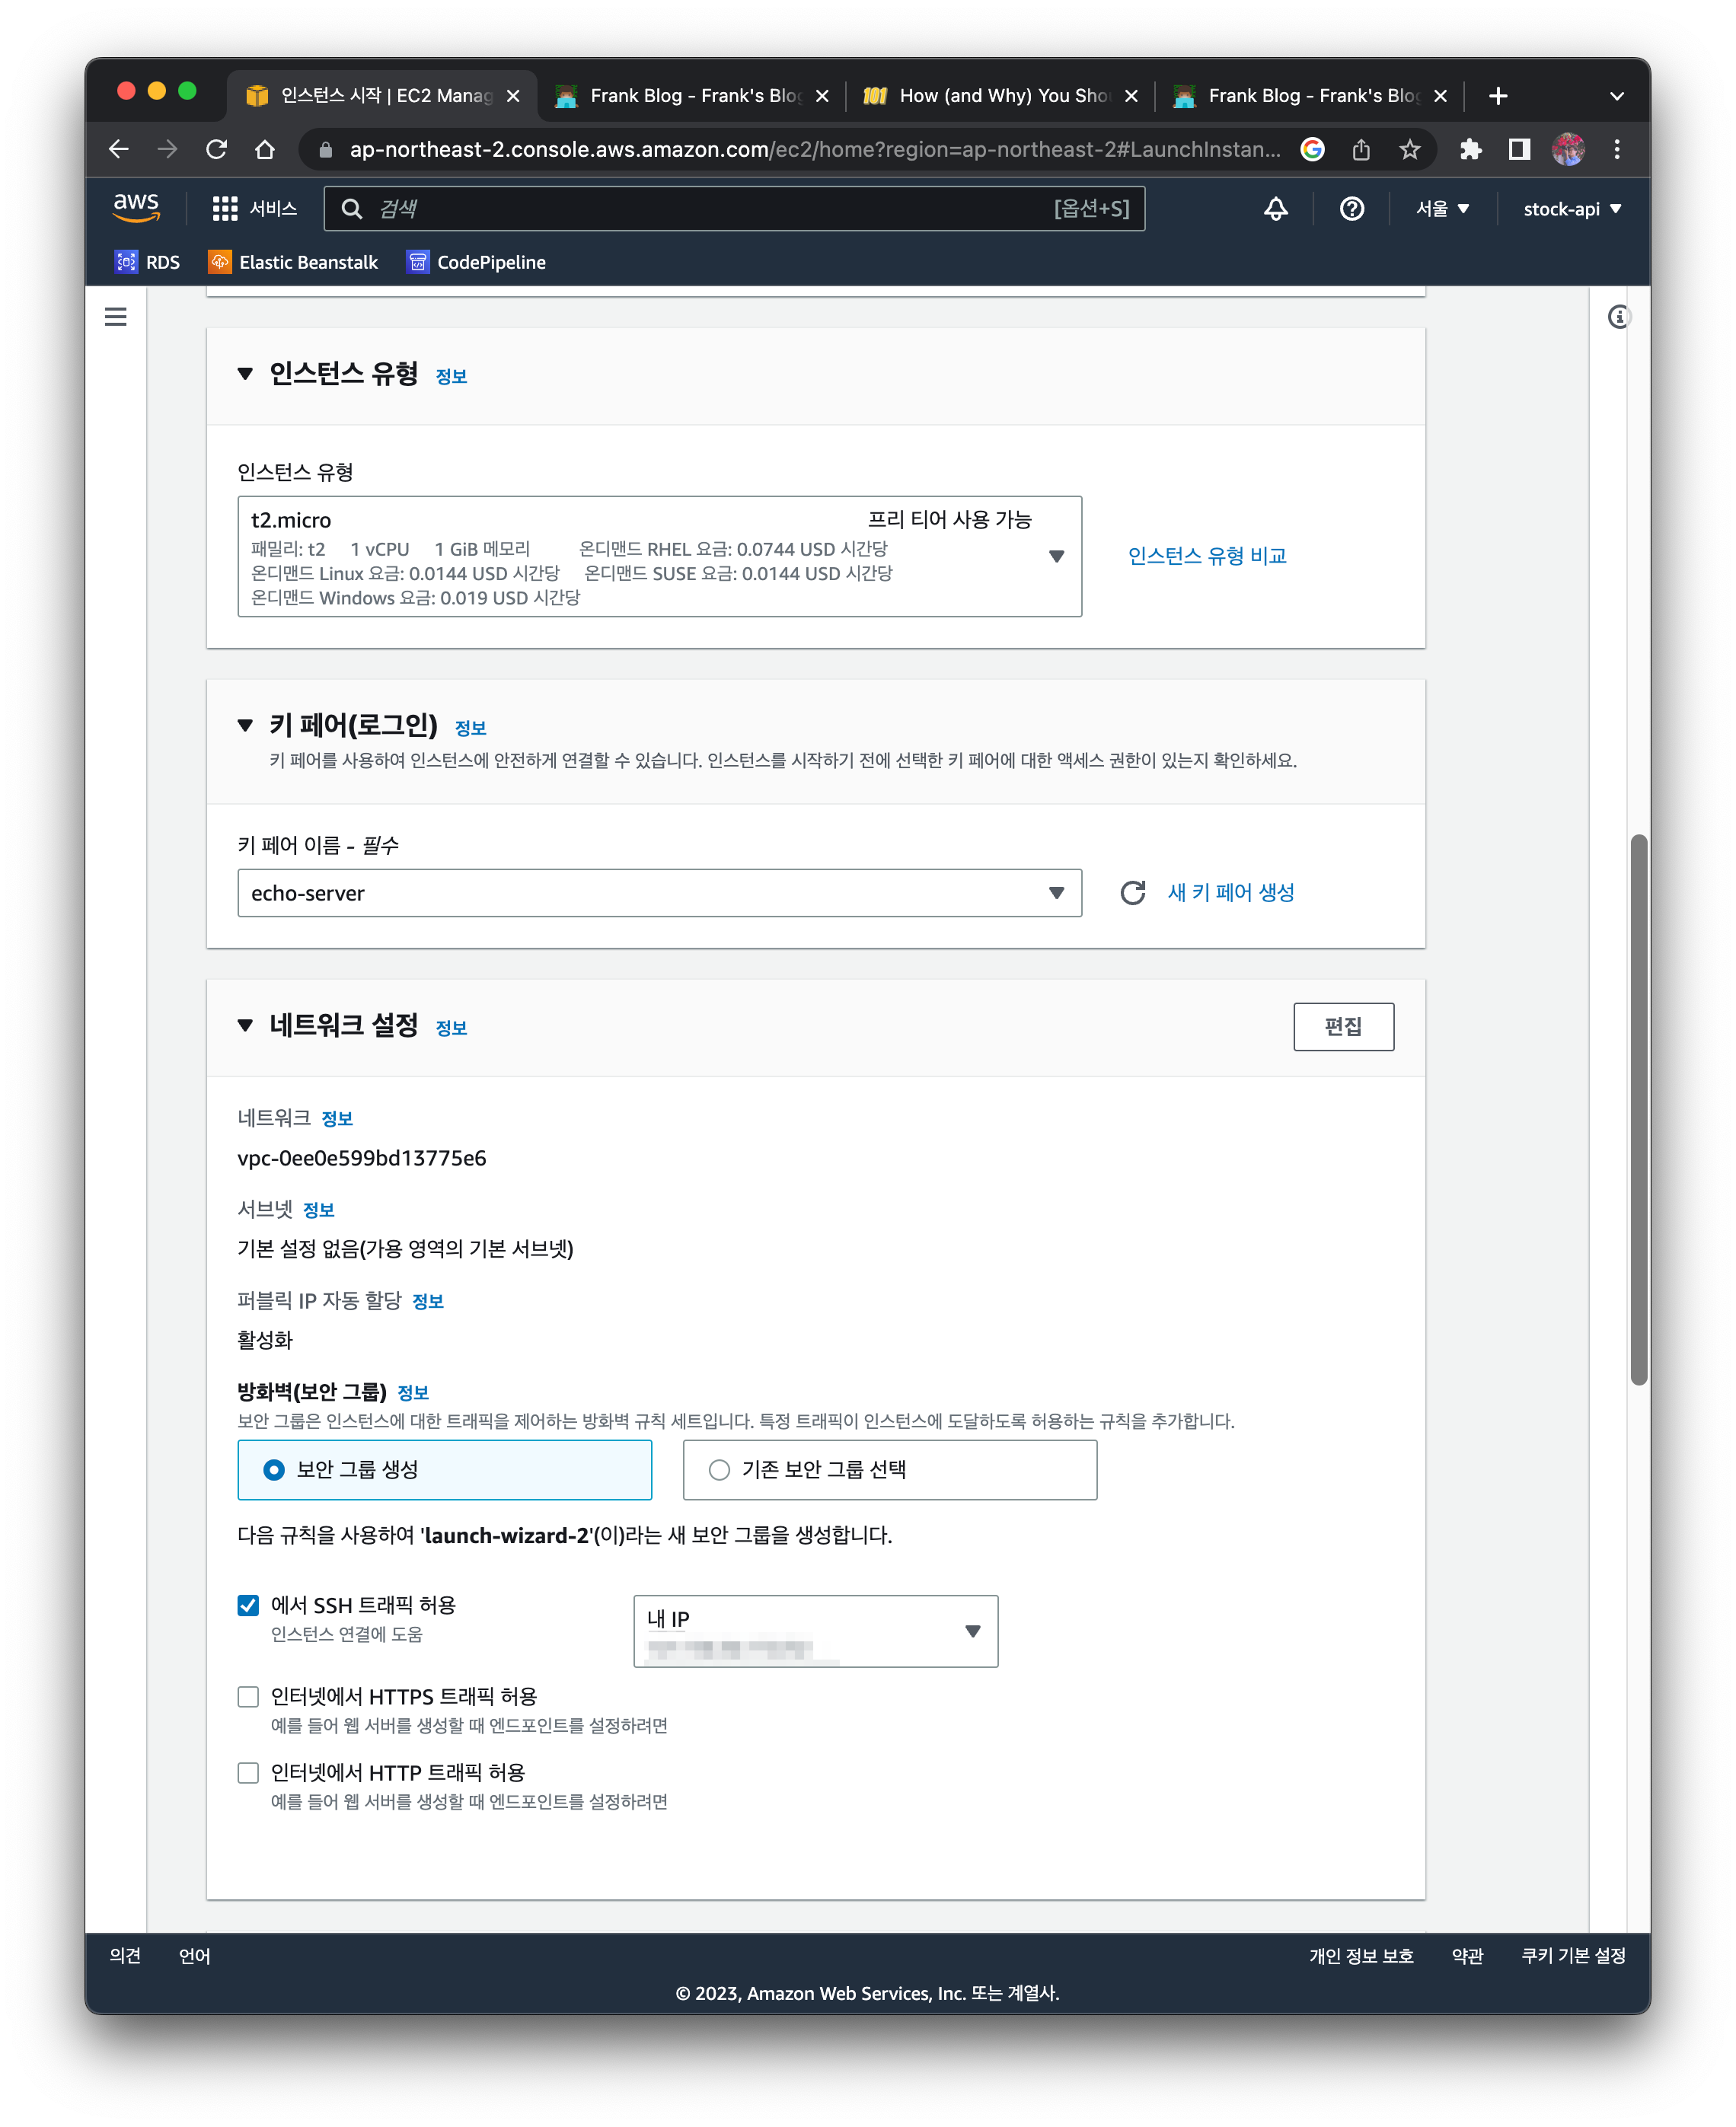
-
Key pair (login):
echo-server- The key pair is needed later to log in via ssh after the EC2 instance is created
- First, click Create new key pair to generate it
-
Network settings
- Check the
Allow SSH traffic fromcheckbox and selectMy IP - If
0.0.0.0/0is selected, anyone can attempt to log in, so it's better to allow access only from a specific network or network address
- Check the
-
Configure storage:
30- The free tier allows up to 30GB, so change it to
30
- The free tier allows up to 30GB, so change it to
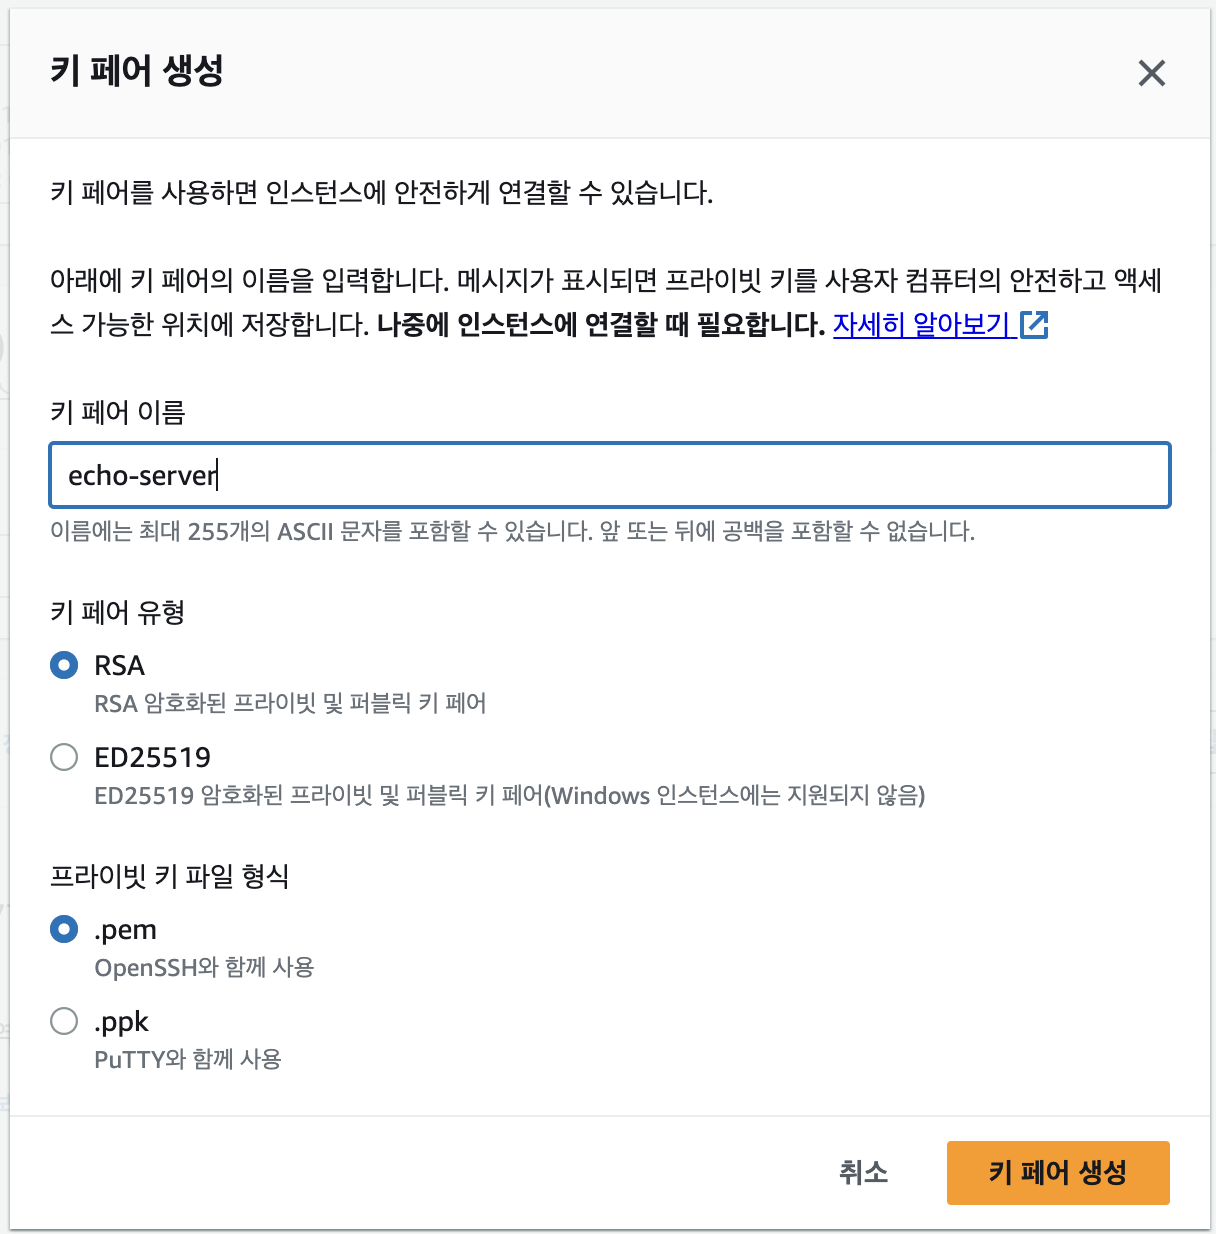
2.1.1 Creating a Key Pair
When you create it, a PEM file is automatically downloaded. The key pair is the file used to access the instance after it is created.
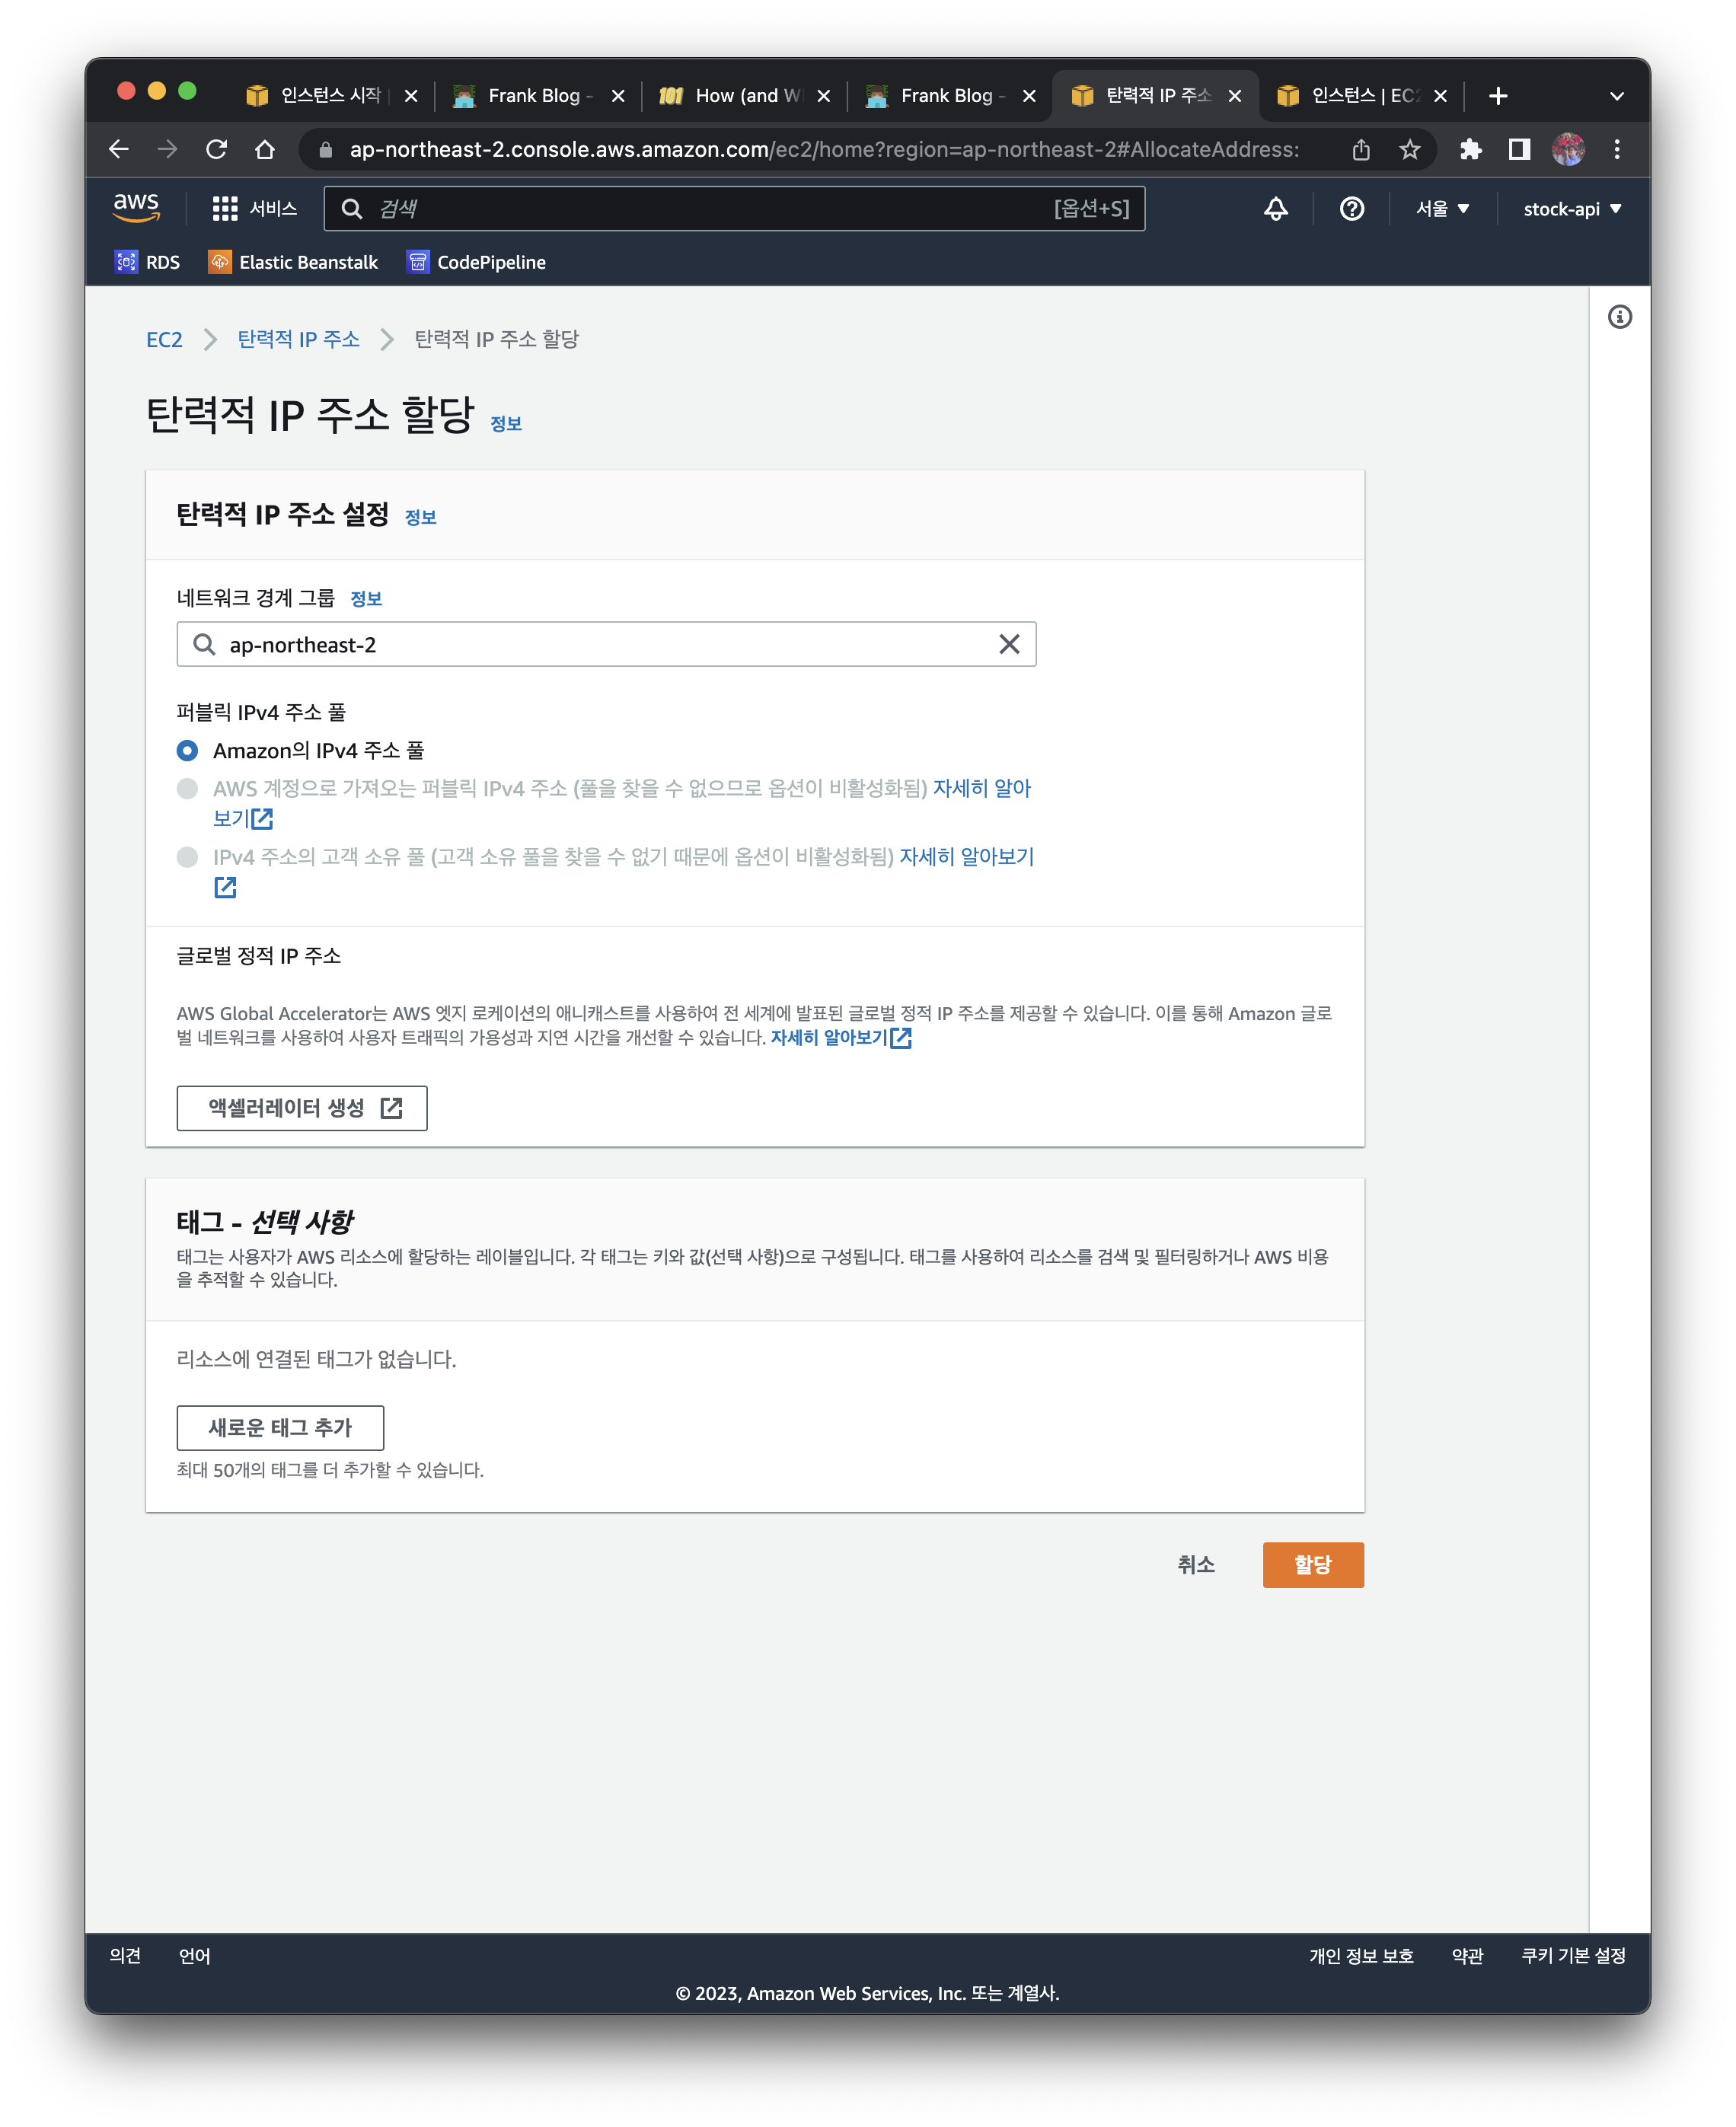
2.2 Setting Up an Elastic IP
When you restart an EC2 instance, a new IP is assigned each time. When the IP changes, you have the hassle of checking the IP address every time you access it from your PC. To get a static IP that doesn't change each time, you need to set up an Elastic IP.
Click EC2 menu > Network & Security > Elastic IPs > Allocate Elastic IP address button. Allocate it with the settings below.
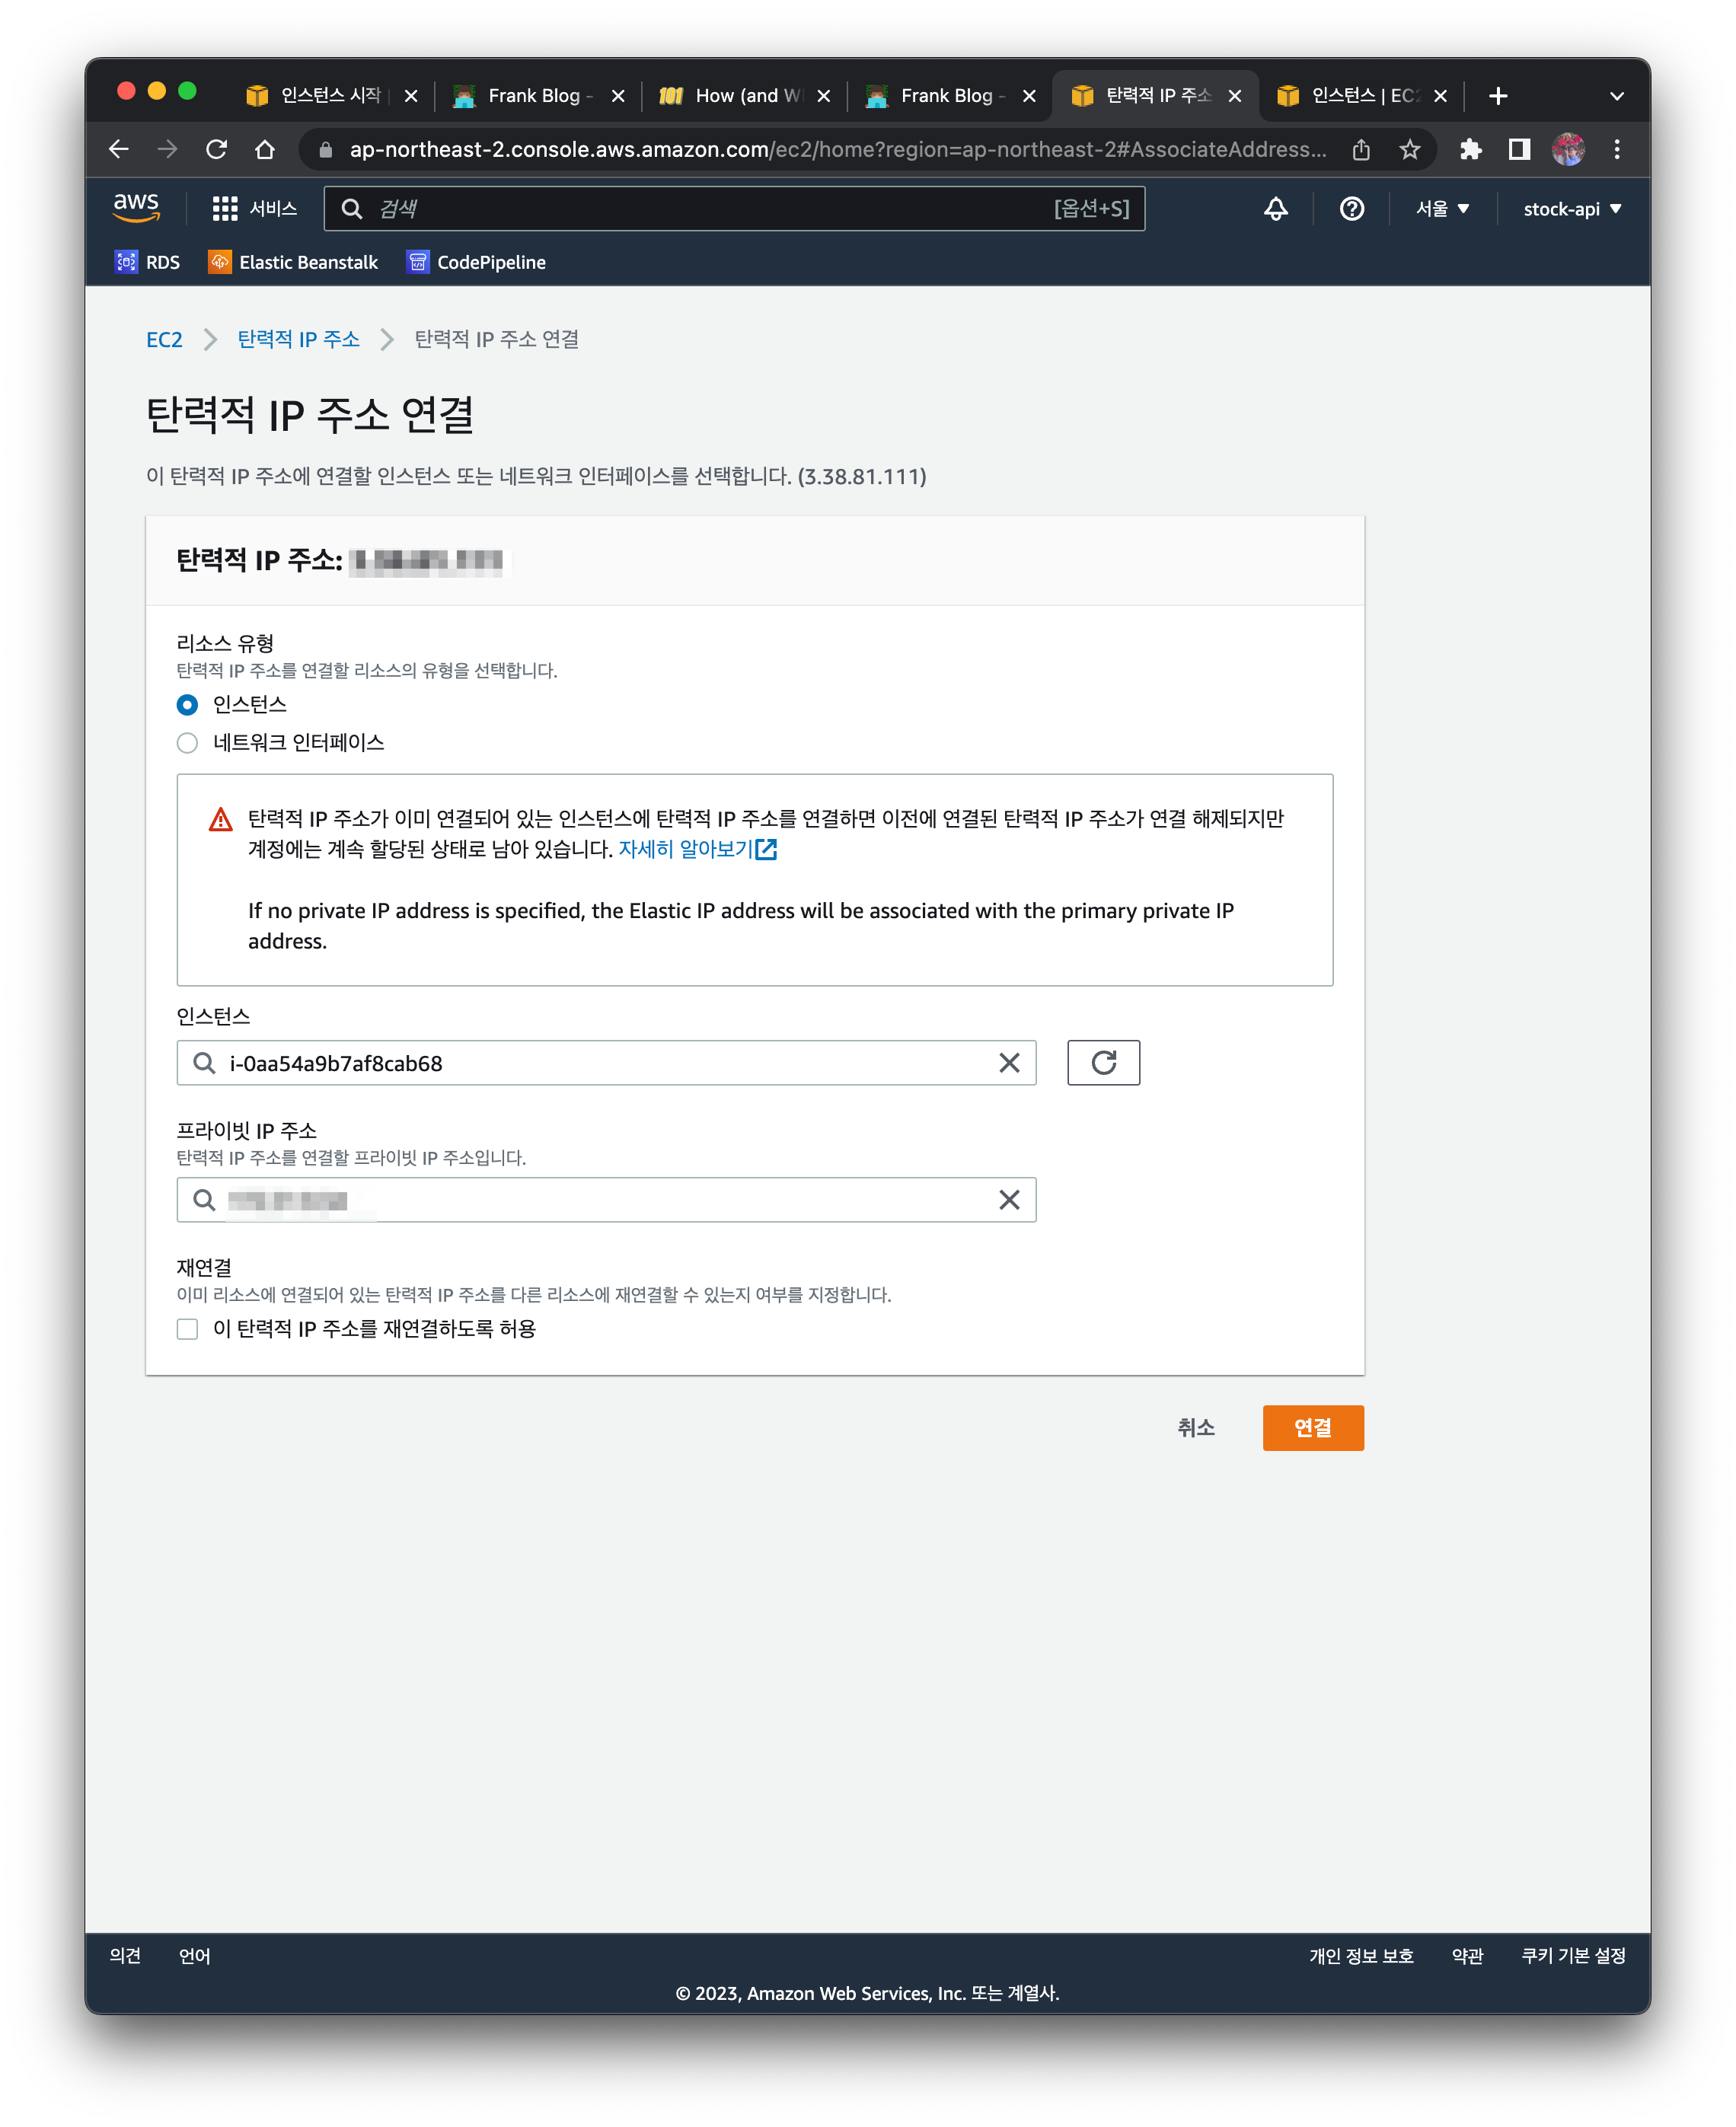
Select EC2 menu > Network & Security > Elastic IPs > Actions pull-down menu > Associate Elastic IP address. Enter the EC2 instance you created and the private IP address.
2.3 Connecting to the EC2 Server via ssh
To access via ssh using the PEM file downloaded above, enter the following command.
2.3.1 Specifying the PEM File in the ssh Option
$ ssh -i echo-server.pem xxx.xxxx.xxx.xxx # EC2's Elastic IP address
Since an IP address is not easy to remember and you have to enter a long command every time, configuring the ssh config file as follows lets you access it with a simple command.
2.3.2 Setting the PEM File and Server IP Address in Advance in the ssh Config
Copy the PEM file to the .ssh folder and change its permissions.
$ cp echo-server.pem ~/.ssh
$ chmod 0600 ~/.ssh/echo-server.pem
Create a config file and enter the following information.
$ vim ~/.ssh/config
# echo-server
Host echo-server #enter the service name you want
HostName xxx.xxxx.xxx.xxx #enter the Elastic IP address
User ec2-user
IdentityFile ~/.ssh/echo-server.pem

$ chmod 0700 ~/.ssh/config
Now, entering the command below lets you log in to the EC2 instance.
$ ssh echo-server
Last login: Tue Mar  7 20:08:03 2023 from 59.10.139.253

       __|  __|_  )
       _|  (     /   Amazon Linux 2 AMI
      ___|\___|___|

https://aws.amazon.com/amazon-linux-2/
19 package(s) needed for security, out of 22 available
Run "sudo yum update" to apply all updates.
[ec2-user@xxx.xxx.xxx.xxx ~]$
2.4 Additional EC2 Instance Configuration After Creating EC2
2.4.1 Changing the Timezone
The default timezone of the EC2 server is UTC. Change the timezone to match Korean time.
$ sudo rm /etc/localtime
$ sudo ln -s /usr/share/zoneinfo/Asia/Seoul /etc/localtime
2.4.2 Changing the Hostname
If you manage multiple servers, it's hard to tell which service a server belongs to from the IP address alone, so change the Hostname.
Here's how to change the hostname based on the Amazon Linux AMI 2 image.
$ sudo hostnamectl set-hostname echo-server
Additionally, registering the hostname in /etc/hosts makes it convenient to access by the registered hostname, so let's modify that together.
$ vim /etc/hosts
127.0.0.1 echo-server

$ reboot
You can access it using the registered hostname instead of the IP address.
$ curl echo-server
curl: (7) Failed to connect to echo-server port 80: Connection refused
The above error message appears because no server has been started yet, but you can confirm that running curl with the hostname works fine.
Reference
2.5 (Optional) Additional EC2 Security Group Configuration
If you did not allow ssh traffic when creating the EC2 instance, you need to add the configuration to the security group.
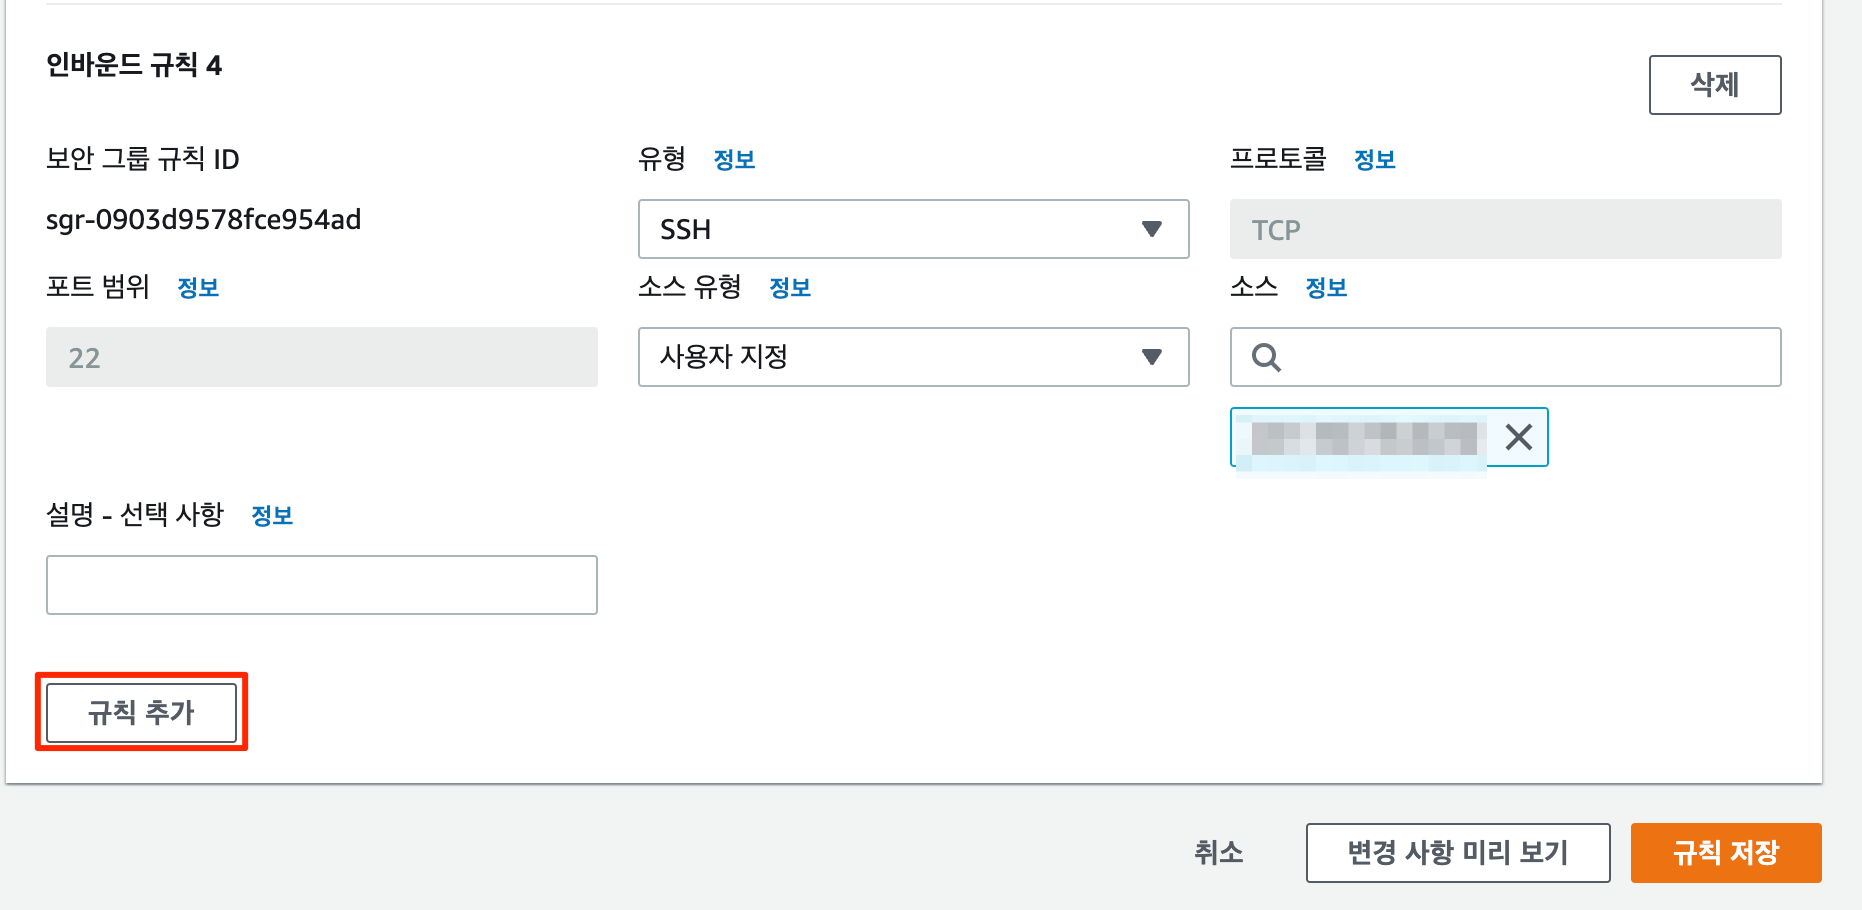
Select Network & Security > Security Groups > the security group applied to the EC2 instance > Actions pull-down menu > Edit inbound rules.
Click the Add rule button at the bottom and select Source type > My IP so that it's accessible only from your computer.
3. Deploying the API to EC2
3.1 Downloading the Source Code from Github
Access the EC2 instance via ssh and download the source code from github.
$ ssh echo-server
$ git clone https://github.com/kenshin579/echo-server
3.2 Installing golang
The Echo server is written in golang, so install golang.
$ sudo yum install -y golang
3.3 Building the Source Code
A build command is specified in the Makefile, so you can easily build with make.
$ make build
go mod tidy
go build -v -o bin/go-echo-server cmd/server/main.go
go.uber.org/dig/internal/graph
go.uber.org/fx/internal/fxclock
go.uber.org/dig/internal/digerror
go.uber.org/dig/internal/digreflect
go.uber.org/dig/internal/dot
golang.org/x/tools/go/internal/cgo
go.uber.org/fx/internal/fxreflect
go.uber.org/fx/fxevent
go.uber.org/dig
github.com/labstack/echo/v4
golang.org/x/tools/go/loader
go.uber.org/fx/internal/lifecycle
go.uber.org/fx/internal/fxlog
github.com/swaggo/swag
go.uber.org/fx
github.com/kenshin579/echo-server/ping/route/http
github.com/kenshin579/echo-server/echo/route/http
github.com/labstack/echo/v4/middleware
github.com/kenshin579/echo-server/docs
github.com/swaggo/echo-swagger
github.com/kenshin579/echo-server/cmd/bootstrap
command-line-arguments
3.4 Running Echo and Testing It from the Outside
3.4.1 Running the API
$ go run cmd/server/main.go
[Fx] PROVIDE    *echo.Echo <= github.com/kenshin579/echo-server/cmd/bootstrap.newEcho()
[Fx] PROVIDE    fx.Lifecycle <= go.uber.org/fx.New.func1()
[Fx] PROVIDE    fx.Shutdowner <= go.uber.org/fx.(*App).shutdowner-fm()
[Fx] PROVIDE    fx.DotGraph <= go.uber.org/fx.(*App).dotGraph-fm()
[Fx] INVOKE             github.com/kenshin579/echo-server/echo/route/http.NewEchoHandler()
[Fx] INVOKE             github.com/kenshin579/echo-server/ping/route/http.NewPingHandler()
[Fx] INVOKE             github.com/kenshin579/echo-server/cmd/bootstrap.serve()
[Fx] HOOK OnStart               github.com/kenshin579/echo-server/cmd/bootstrap.serve.func1() executing (caller: github.com/kenshin579/echo-server/cmd/bootstrap.serve)
{"time":"2023-03-18T17:41:47.605105+09:00","level":"INFO","prefix":"-","file":"app.go","line":"46","message":"Starting echo api server."}
[Fx] HOOK OnStart               github.com/kenshin579/echo-server/cmd/bootstrap.serve.func1() called by github.com/kenshin579/echo-server/cmd/bootstrap.serve ran successfully in 179.625µs

   ____    __
  / __/___/ /  ___
 / _// __/ _ \/ _ \
/___/\__/_//_/\___/ v4.10.2
High performance, minimalist Go web framework
https://echo.labstack.com
____________________________________O/_______
                                    O\
[Fx] RUNNING
⇨ http server started on [::]:80
3.4.2 Accessing the API from the Outside
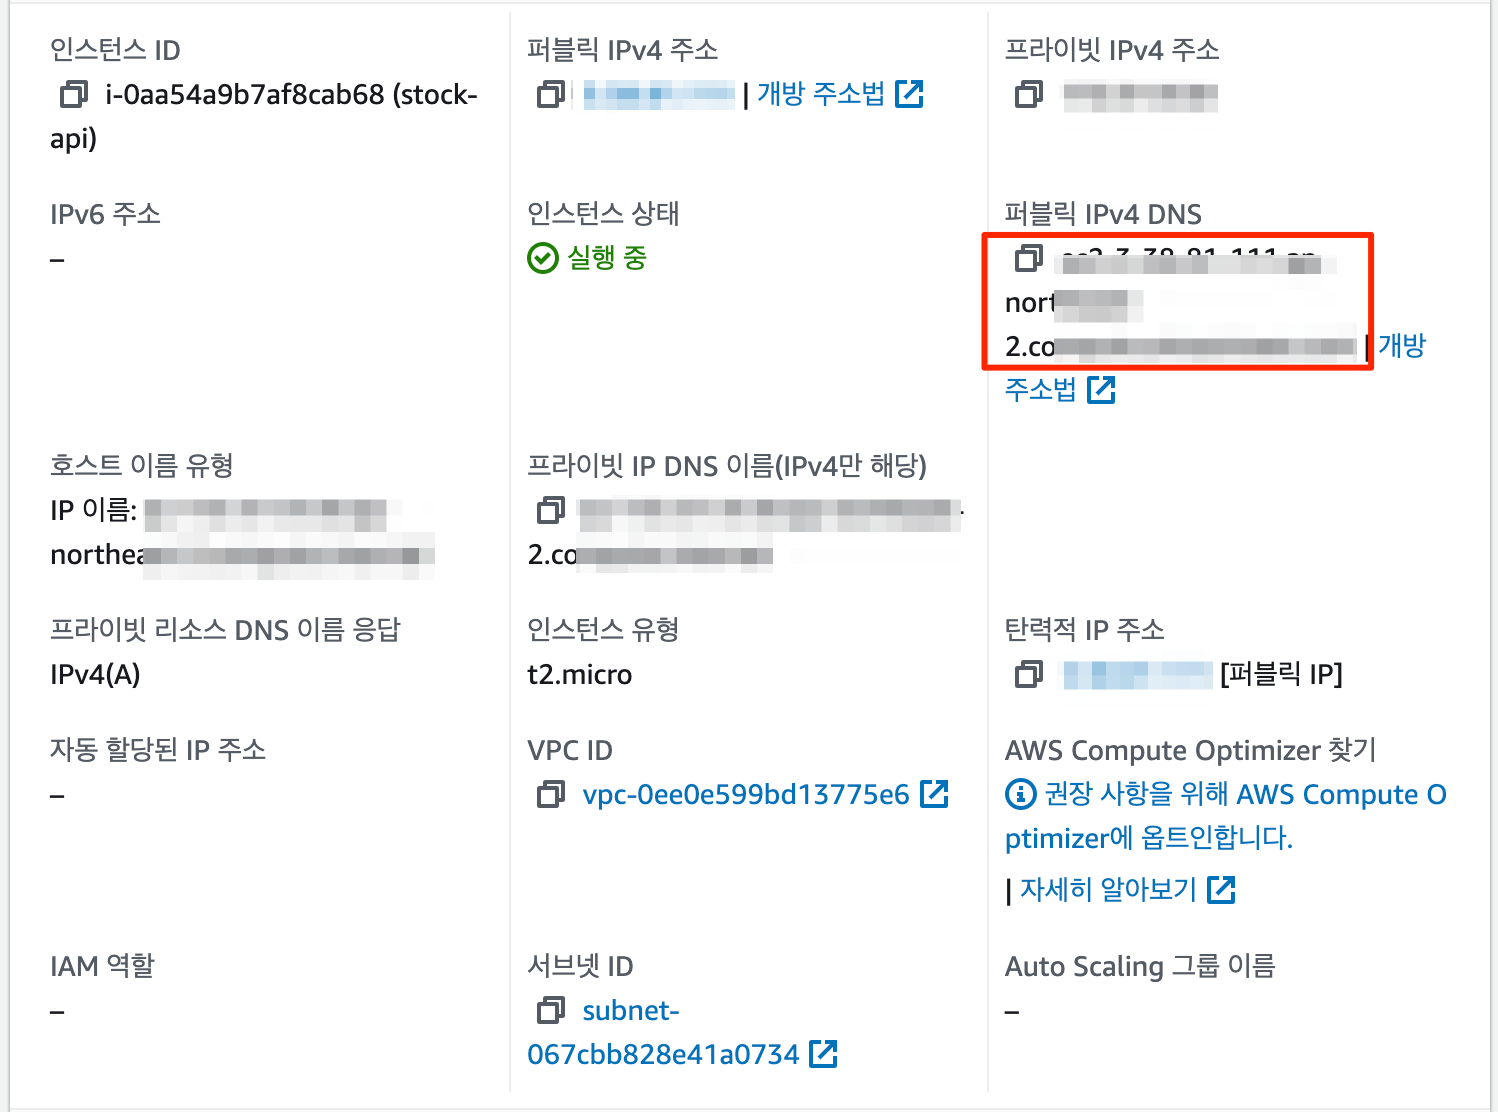
First, you need to know the EC2 public address to access it, so check it in the EC2 instance details.
Instances > Instances > select the instance ID from the instance list to see the IP address or DNS address.
When you call the API with the curl command, you can confirm that it works fine. Done!!
$ curl --location 'https://ec1-3-30-20-2342.ap-northeast-2.compute.amazonaws.com/ping'
Pong